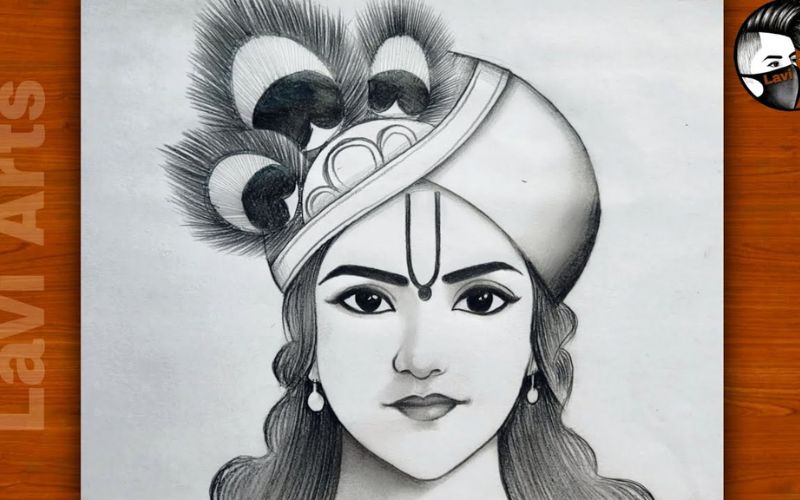
Drawing is a universal language that transcends boundaries and cultures, allowing us to express our thoughts, emotions, and beliefs visually. Among the many subjects that inspire artists worldwide, religious and mythological figures hold a special place. In Indian culture, Lord Krishna, one of the most revered deities, has been a source of artistic inspiration for centuries. His stories, which are rich in symbolism and moral lessons, have been depicted in various art forms, including painting, sculpture, and drawing. This article will guide you through creating an easy Krishna drawing, suitable for beginners.
Understanding Krishna’s Iconography
Before diving into the drawing process, it’s essential to understand the symbolism associated with Lord Krishna. Krishna is often depicted in various forms, each representing a different aspect of his personality. The most common representations include:
- The Child Krishna (Bal Krishna): Depicted as a young boy playing with a flute, often with a mischievous smile, symbolizing joy and innocence.
- The Lover Krishna (Ras Leela Krishna): Often shown playing the flute surrounded by the Gopis (cowherd girls), symbolizing divine love.
- The Warrior Krishna (Mahabharata Krishna): Depicted as the charioteer of Arjuna in the Mahabharata, symbolizing duty and righteousness.
For this guide, we’ll focus on drawing the Child Krishna, known for his playful and innocent demeanor.
Materials You’ll Need
- Paper: Start with a plain sheet of paper. A sketchbook or drawing paper with a smooth surface is ideal.
- Pencils: Use HB or 2B pencils for outlining and light shading, and a 4B or 6B pencil for darker areas.
- Eraser: A soft eraser is essential for correcting mistakes and highlighting.
- Blending Tool: A blending stump or cotton swab for smooth shading.
- Colored Pencils or Watercolors (Optional): If you want to add color to your drawing.
Step-by-Step Guide to Drawing Krishna
Step 1: Basic Outline
- Head and Body Proportions: Start by lightly sketching a circle for Krishna’s head. Below the circle, draw an oval shape for the torso. The head should be relatively larger, giving him a childlike appearance. Add guidelines to divide the face into four sections (horizontally and vertically) to help place facial features.
- Facial Features: On the horizontal guideline, mark the points for the eyes. Draw two almond-shaped eyes with large pupils, reflecting innocence. Below the eyes, draw a small nose and a curved line for the smiling lips.
- Ears and Hair: Draw Krishna’s slightly elongated ears on either side of the head. For the hair, sketch a rough outline of Krishna’s curly hair, typically tied up in a top knot with a peacock feather.
- Arms and Legs: Sketch the basic shapes for Krishna’s arms and legs using simple lines and ovals. His posture is usually playful, so consider drawing him with one hand holding a flute and the other hand in a resting position.
Step 2: Refining the Outline
- Defining the Face: Refine the facial features by adding details to the eyes, such as the pupils, eyelashes, and eyebrows. Krishna’s eyes are often depicted as large and expressive, so emphasize this in your drawing.
- Hair Details: Define Krishna’s hair by adding curls and waves. Pay attention to the top knot, and don’t forget to add the iconic peacock feather, which is a symbol of beauty and grace.
- Clothing and Ornaments: Krishna is traditionally depicted wearing simple yet elegant clothing. Sketch the outline of a dhoti (a traditional Indian garment) around his waist. Add a garland of flowers around his neck and bracelets on his wrists. You can also draw a simple crown or headpiece, adorned with jewels.
- The Flute: Draw the flute in Krishna’s hand, making sure it aligns well with the fingers. The flute is a significant symbol in Krishna’s iconography, representing divine music and harmony.
Step 3: Adding Details and Shading
- Shading the Face: Start shading Krishna’s face lightly, following the contours to give it a three-dimensional look. Use a blending tool to smooth out the shading and create a soft, youthful appearance.
- Shading the Hair: Darken the hair with a 4B or 6B pencil, emphasizing the curls and waves. The hair should contrast with the face, making it stand out. Use the eraser to highlight strands of hair for added texture.
- Clothing and Ornaments: Shade the dhoti and ornaments, adding folds and creases to make them appear more realistic. The garland can be shaded lightly, with each flower detailed individually. For the jewels, use small highlights to make them sparkle.
- The Flute: Shade the flute lightly, making sure it contrasts with Krishna’s hand. Add small details like the finger holes and patterns on the flute.
Step 4: Background and Final Touches
- Background Elements: To enhance your drawing, you can add simple background elements like a few clouds, trees, or a riverbank. These elements should be lightly sketched and shaded, ensuring they don’t overpower Krishna’s figure.
- Highlighting: Use the eraser to add highlights to Krishna’s face, hair, and ornaments. This will give your drawing a polished look. Focus on areas where light would naturally fall, such as the forehead, cheeks, and the top of the nose.
- Coloring (Optional): If you choose to color your drawing, use soft, vibrant colors. Krishna is traditionally depicted with blue skin, representing his divine nature. The peacock feather can be colored with shades of green and blue, while the clothing can be in earthy tones like yellow or orange.
Step 5: Review and Adjust
- Step Back and Review: Take a moment to step back and look at your drawing from a distance. This will help you spot any areas that need adjustment or additional shading.
- Make Necessary Adjustments: If any lines are too harsh or any areas appear flat, adjust them by blending or adding more shading. Ensure that the proportions are consistent and that Krishna’s expression captures the intended emotion.
- Final Details: Add any final details that will enhance the drawing, such as small curls of hair, additional folds in the clothing, or subtle textures on the flute.
Tips for Beginners
- Practice Basic Shapes: Before attempting the full drawing, practice sketching the basic shapes and proportions. This will help you gain confidence in drawing Krishna’s figure.
- Use References: Don’t hesitate to use reference images of Krishna from various sources. This can help you understand the different ways Krishna is depicted and allow you to choose the style that resonates with you.
- Start Light: Always start with light pencil strokes. This makes it easier to erase mistakes and refine the drawing as you go along.
- Be Patient: Drawing, especially as a beginner, can be challenging. Take your time, and don’t rush the process. With patience and practice, your skills will improve.
- Experiment with Styles: While this guide focuses on a specific style of Krishna drawing, feel free to experiment with different styles, such as more abstract or stylized interpretations. Art is about personal expression, so make the drawing your own.
Conclusion
Creating a drawing of Lord Krishna can be a fulfilling artistic endeavor that connects you with a rich cultural heritage. This step-by-step guide is designed to make the process accessible to beginners while providing enough detail to produce a beautiful and meaningful piece of art. Whether you choose to keep your drawing monochromatic or add vibrant colors, the key is to enjoy the process and let your creativity flow.
As you practice and refine your skills, you’ll find that drawing Krishna—or any other subject—becomes a meditative and rewarding experience. So, gather your materials, set aside some quiet time, and immerse yourself in the art of Krishna drawing. With each stroke, you’ll not only improve your technical skills but also deepen your appreciation for the timeless stories and symbols that have inspired artists for generations.


